- January 29, 2019
- Anne-Marie Brunet
Anne-Marie Brunet, CKBD, CAPS
Following on my previous post about small spaces, (read that one here) I thought I’d share the story, and photos, of another small space I completed not too long ago.
This time it’s a master ensuite that is less than 34 sq ft. and a closet less than 30 sq ft.
Yes, you read that right; that’s not a lot of space for anything these days so read on to see how I maximized the space in these teeny tiny rooms.
Did I mention I love a challenge…lol!
Starting with the BATHROOM
Now, I have to tell you that this poor little bathroom was like a dog at a pound needing to be rescued, and rescue it I was going to!

The bathroom is located on the second floor of a brick house that dates back to the 1850s, a time when indoor plumbing was being installed for the wealthy and, (as would be the case for that era) is in a very tiny space just about big enough for 1 person or maybe two if the other is in the shower. See the floor plan further down.
It was sparse, to say the least, had no storage whatsoever, and the shower, a much later addition, well, it was ‘just there’. At least it was anchored to one wall!
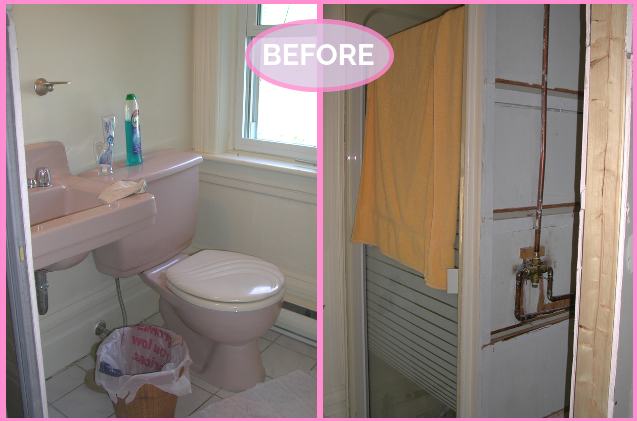
Obviously there had been at least one ‘upgrade’ that likely happened sometime in the 50’s judging by the colour of the fixtures (pink) and then, later on, the ‘newer’ shower was installed.
It was old, tired and dated and certainly ready for a facelift don’t you think?
What struck me, as I was going through my ‘discovery’ routine, was how good the condition of the original pink fixtures was; no scratches, still lustrous and in perfect working condition, oh yeah, and a 6-gallon flush toilet!! I know some people who would kill for that toilet today ..haha!
All of the fixtures went to the Habitat Store and I’m hoping someone picked them up as these retro colours are making a comeback – no kidding! You can check out Kohler’s website to see these colour offerings.
So, I measured, I took pictures, I measured again and then went away to develop a plan for both spaces. How was I going to check everything off the client’s list!?!
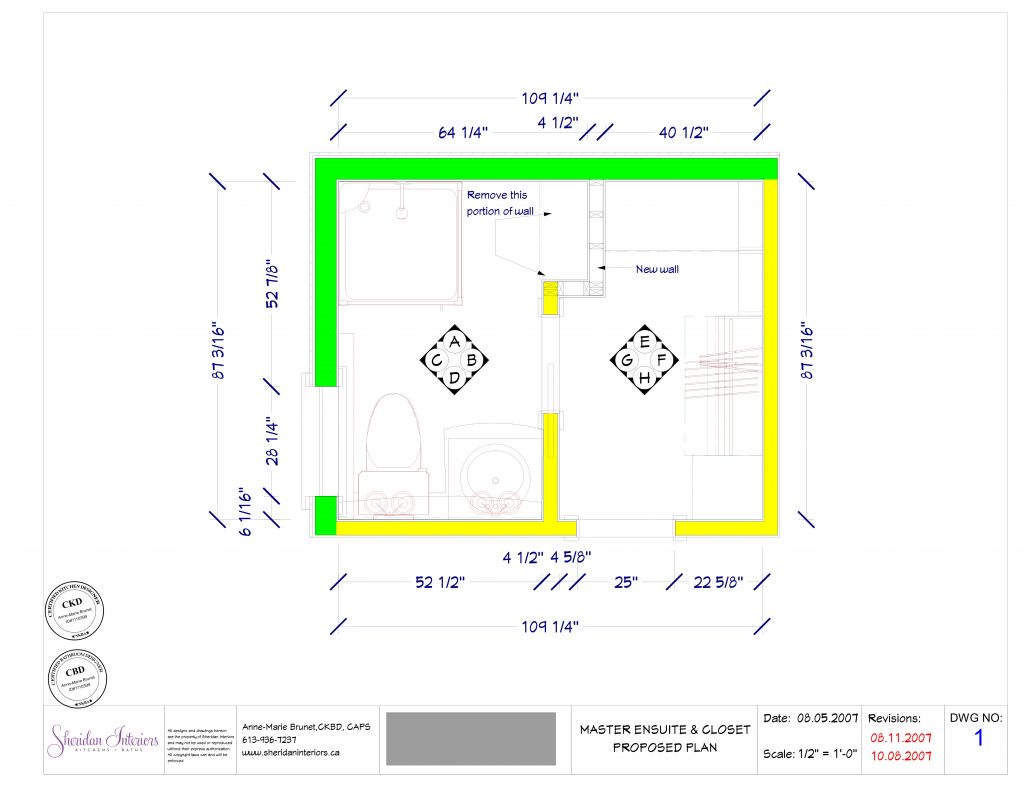
Here’s what I came up with using the SAME FOOTPRINT, but with a little clever manipulation, for both the Bathroom and the Closet.

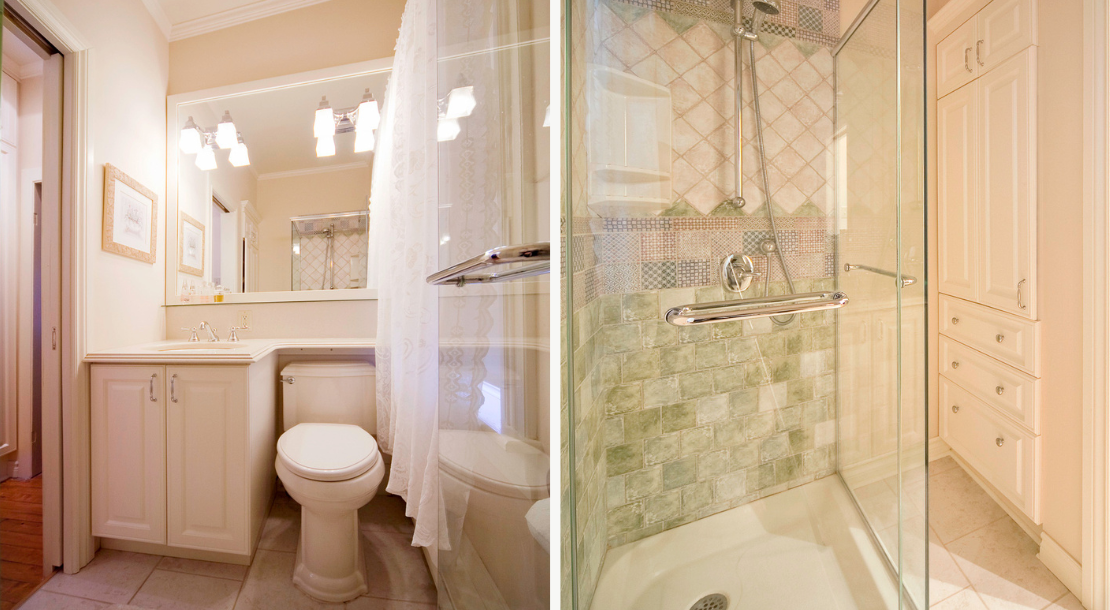
In order to gain some extra storage at the vanity, I extended the countertop over the toilet (also referred to as a ‘banjo’ top). I included a narrow glass shelf, just below the mirror, to hold some ‘pretty’ items, and that also gives extra landing space for small items used daily.
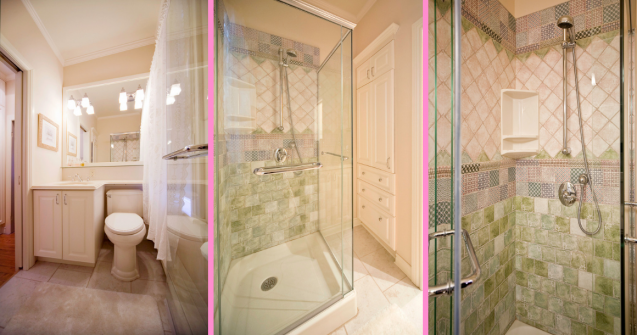
I changed out that ‘horror story’ of a shower for a new rectangular corner unit, a full 5″ bigger, and specified a full glass enclosure to allow the light to travel through and to visually expand the space.
Due to structural and HVAC considerations, the only option left to us for shelving, to hold shampoo and soaps in the shower, was surface mounting corner shelves. The unit is simple in style and easy to clean.
Continuing in my quest to max out the bathroom’s storage potential, I designed a storage cabinet to fit nicely into the new, but tight, ‘niche’ created by the “check wall” and included a couple of interesting features to make it convenient to use. I specified an “accordion” door for the upper half that folds out of the way against the wall and included drawers in the lower portion to reduce bending and stretching.
The impact on storage potential was profound.
Now – hold on to your hat !!!, I was able to add all of this organization and storage within the existing footprint, saving the client a ton of money :)!
It just goes to prove that even a small space can live large …!!!
…and now some detail on the SHOWER TILE inspiration.
The client had expressed enthusiasm for having a tiled wall shower so I went to work creating something that would resonate with the style of the house and, harmonize with the master bedroom.
My inspiration for the bathroom tile colour palette came from the client’s existing bed quilt and wallpaper, and new drapery that we had recently installed.
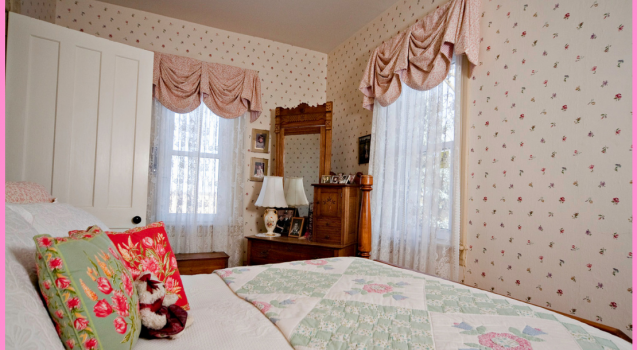
As soon as I saw this tile I knew I had to use it. It had all of the same characteristics and colours of the bedroom, and the style of the tile and pattern bordered on a little country, a little rustic and the colours were perfect !!
I swear it was meant to be ♥.
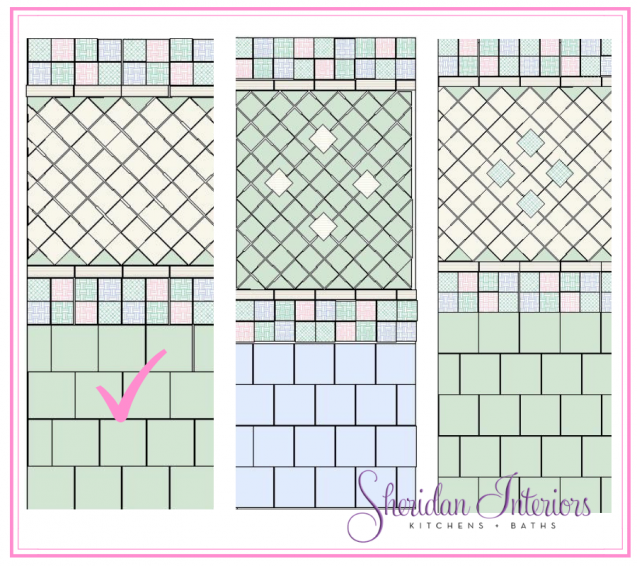
So, I mapped out 3 aesthetically pleasing options and the one on the left is the one the client, ultimately, went with. Great choice…!!!!!
I’m pretty pleased with this little gem of a bathroom now and, more importantly, so is the client.
I think the shower turned out smashing and is in keeping the rustic/elegant country look!
CHALLENGE #2 – THE CLOSET
You’ll notice when you look at the floor plan, that in order to get to that tiny ensuite, you have to go through a very tiny closet.
Closets in the 1850s were pretty small simply because most people owned only a few articles of clothing. A bit of trivia for you; hangers weren’t even invented until 1869!
So challenge #2 was how to organize a woman’s closet, (read lots of clothing and shoes), in this tiny space?
Yep, this was going to be another challenge – but then, I like the challenge of small spaces!
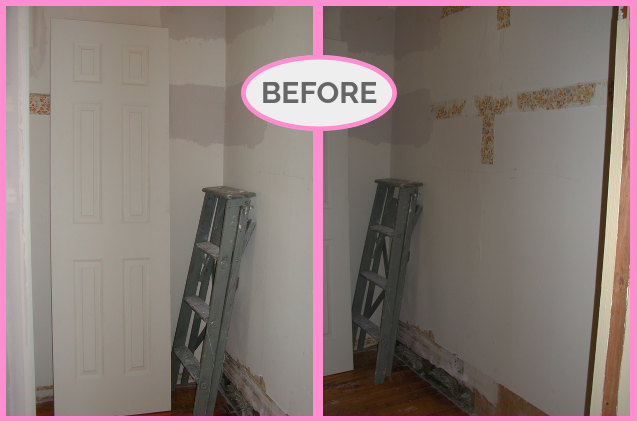
This is the closet space once we ripped out the old rods. The door leaning against the back wall was re-used as the pocket door to the bathroom. We discovered the old wallpaper once we removed the shelf and rod.
Here’s the floor plan again for you (you’re welcome J)
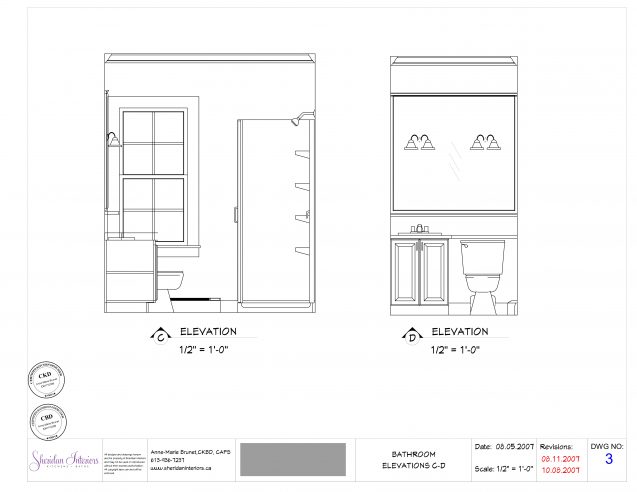
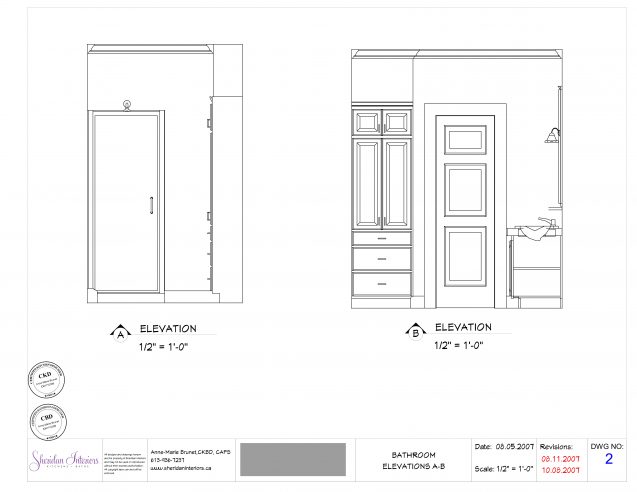
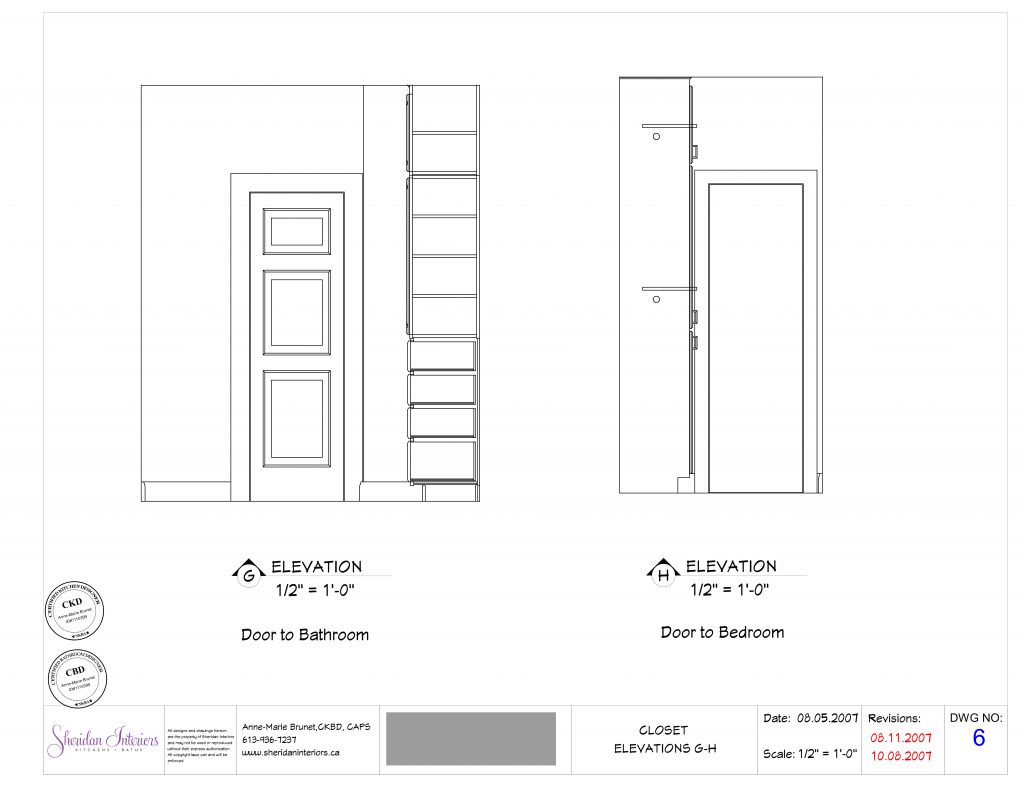
Here are the wall elevations for this small closet – and wow, we increased the storage capacity in here ..A LOT!!
(You can refer to the letter on the floor plan and elevation to understand which wall you’re looking at)

Added Note:
I have worked with this client for several years reviving the home, room by room. We have upgraded it to meet her current functional requirements all the while being mindful of her very discerning taste as it relates to the home’s style and vintage.
While none of the renovations were meant to be ‘authentic’ restorations, I think the house definitely got its ‘groove’ back and did it without betraying its architectural heritage. (you can see the kitchen remodel here)
It took some commitment and a lot of elbow grease to get it to where it is today but the house, as it stands, is a beauty of a gem in a rural setting. I even had the honor of decorating it for a XMAS show house one year. It was magical!
HERE’S A QUICK RECAP OF WHAT WAS DONE
WHAT THEY LOST
-A cramped, dark and tired, dated and dysfunctional bathroom
-An old shower with leaky plumbing
-A small shower
-Daily frustration of having to deal with THAT shower – ugh!
WHAT THEY GAINED:
-A pretty and functional bathroom
-A lot more storage and counter space at the vanity area
-A wall-to-wall mirror that reflects MORE light throughout the space
-Better lighting throughout
-New fixtures and fittings; sink, faucets, shower, toilet
-A beautifully personalized tiled shower
-New floor tile
-Extra storage with a well-planned dedicated bathroom storage cabinet with drawers
-An amazing ‘small’ closet with maximized storage that actually works
…and lots of pretty – that’s a Win-Win in my books!
To see a list of all of the services we offer click here, or join us on Facebook to see what we do behind the scenes, discover new product introductions and more inspiring photos.
So if you’re thinking about a bathroom renovation, or are building new, or have a different kind of project in mind and you’re just not sure how to go about it, register below for a FREE 15-minute DISCOVERY call to see how we can help you!
Select date and time:
Serving Cornwall, Ottawa, Massena, Malone and surrounding areas.
613-936-7237
info@sheridaninteriors.ca